Butter Chicken

After quite a number of requests, I bring you my butter chicken recipe this week. It’s definitely a crowd pleaser, liked by all ages, owing to its creamy tomato flavour. As the name suggest it contains butter – quite a lot if I’m honest – and cream, so perhaps this is one that you cook once in a while as opposed to each week. It’s delicately spiced as opposed to spicy so by default appeals to most palates. It is the one curry that using the breast meat works well. Typically I would always suggest using chicken thigh or the whole chicken cut into pieces by your butcher, but for butter chicken breast meat is perfect.

Whilst it is super straightforward to make there are a few stages to consider. You need to marinate the meat – minimum an hour or even overnight if you are really organised. After this you then char the chicken in a pan (grill also works well). Using the same pan you lightly bronze the onion and blitz that into a smooth paste. Next step is to create a buttery, creamy tomato sauce before adding the onion and meat and allowing it to simmer and infuse together. It can be cooked in advance so is certainly a good one if you are entertaining. I think you are going to like it. If you are on instagram and you make please tag me @chilliandmint #chilliandmint

Have a good week everyone.

Butter Chicken

Serves 6 (if serving with other dishes)

750g chicken breast or thigh (boneless), cut into bite sized pieces

marinade

3 tbsp full fat natural yoghurt

1 tsp turmeric powder

1 tsp Kashmiri chilli powder

1 tsp garam masala powder

1 tsp coriander powder

juice from half a lemon

1 tsp salt


onion puree

1 tbsp ghee (clarified butter) or regular butter

2 tbsp oil

2 white onions, roughly chopped


creamy tomato sauce

75g salted butter

400g passata (or fresh tomatoes)

1 tsp garam masala

1 tsp Kashmiri chilli powder

1 tsp jaggery/brown sugar

1 tsp salt

pinch freshly ground black pepper

150ml double cream

1 tbsp dried methi/fenugreek leaves


  1. First you need to marinate the chicken. Mix all the marinade together and then cover tightly with cling film/foil and place in the fridge for an hour – to overnight.
  2. Once you have marinated the chicken sufficiently heat the ghee/butter in a frying pan.  Add the pieces of chicken so that they sealed and charred on both sides. This takes about 3-4 minutes on each side. They won’t be completely cooked at this stage so don’t try and nibble a piece quite yet! You will need to char the chicken in batches so that it does not overcrowd the pan. You do not want to steam it so don’t overcrowd the chicken or put a lid on the pan.
  3. Once all the chicken pieces have been charred, place in a bowl and keep to one side.
  4. In the same pan add the ghee and gently fry the onion so that it begins to bronze – this will take around 6 minutes. Remove from the pan, with all the charred scrapings from the bottom and blitz into a smooth paste using a small blender.
  5. In a deep pan/karahi, add the butter. When it is melted add the spices followed by the passata, black pepper, salt and jaggery/sugar. (If you are using fresh tomatoes, cook for 5 minutes in the pan and then blitz these too into a smooth paste and then return to the pan to follow the next steps.) Allow to simmer on a gentle heat for 7 minutes, by which time the sauce will have thickened sufficiently.
  6. Add the double cream, onion puree, chicken and dried fenugreek. Simmer gently for 15-20 minutes on a low heat. Taste test and add more salt (and butter if you fancy) if needed.

To serve add a pinch more dried fenugreek and a drizzle of double cream. Equally fresh coriander on top would work well to serve.

It is delicious eaten with naan or rice. Accompanying dishes that would work well would be my chana dal and I will be eating mine with my tindora/ivy gourd curry.


10 Minute Vegetable Noodle Broth

Earlier this week I popped the photo above onto my instagram feed. It was a last minute speedy photo, not really styled, but a quick snap before I dived in. I hadn’t given it much attention but thought I would pop it up on my feed. It was simply a quick broth that I had thrown together in 10 minutes one lunch time. I hadn’t made the broth from scratch by boiling up the bones/veg, it was a quick fix that hit the spot and fast.

It had such a positive response with a number of people asking me for the recipe that I thought I would pop it up on my blog so you can all see how quick and easy it is to prepare.

In fact I have popped up very similar recipes on my blog to this one over the last few years. Check out the following. All equally delicious and pretty simple to make as you will see.


Fragrant Lemongrass and Ginger Salmon Broth

Chiang Mai Noodle Broth

Miso Chilli Vegetable Noodle Broth

King Prawn Noodle Broth


So for the one I made earlier this week the magic ingredient is my garlic confit. Have you tried making it? I popped it up on a post in the summer and all I can say is that it is now my fridge staple.

If you haven’t made a batch then simple add olive oil and add 4 garlic cloves, finely chopped. Let me know how you get on if you make it and tag me #chilliandmint @chilliandmint on your instagram feeds. Happy lunch time eating all. Life’s too short to rely on sandwiches and salads every lunch.

10 Minute Vegetable Noodle Broth

serves 2

2 tbsp of garlic confit oil or regular olive oil if you have not made my recipe above

4 garlic confit cloves or 4 regular garlic cloves, chopped

2 inch piece of fresh ginger, skin removed and finely chopped into batons

3 spring onions, sliced at an angle

1 red or green chilli, finely chopped, optional

1 heaped tbsp of white miso paste

1 pint boiling water

1 tbsp light soy sauce

8 broccoli florets, chopped in half

2 large handfuls of fresh spinach

2 packets of udon noodles

2 eggs

10 cherry tomatoes, chopped in half

handful of fresh coriander

sprinkling of Japanese togarashi


  1. Gently lower the eggs into a pan of boiling water. If you want soft boiled eggs leave for 6 minutes max and if you want hard leave them for 8 minutes.
  2. In another pan, heat the garlic confit oil and garlic in a pan. If you have not made a batch of garlic confit – do seriously – you won’t look back after you have made one batch. Otherwise use olive oil and some fresh garlic roughly chopped. Move around the pan for a few minutes.
  3. Add almost all the  ginger batons, spring onions and chilli (if adding) followed by the miso paste and light soy sauce. Move around the pan for 20 seconds and then add the boiling water. I never actually measure out the water so add a pint and if you think it needs more, which it may well do add a little more.
  4. Add the udon noodles and broccoli and simmer gently for 3-4 minutes.
  5. Add the tomatoes, spinach and leave for 1 minute before turning off the heat. Taste test the broth and add more miso paste, soy sauce, boiling water to your liking.
  6. Remove the eggs from the pan and run under cold water whilst you remove the shell – you will find it easier to remove the shell this way. Cut them in half lengthways.
  7. Ladle the broth and noodles into deep bowls then add a good handful of fresh coriander, the remaining fresh ginger batons and place the eggs on top. Sprinkle some Japanese togarashi on top.

I often like to add a little Sriracha on top.

So easy and great for lunch or supper whether you are on your own or with company.

Slurping compulsory. Enjoy.


Roasted Fennel with Orange and Crushed Red Pepper Flakes

Friends from California came and stayed at the weekend and gave me the Gjelina cookbook, which I have been cooking from ever since. My goodness it is good. Having received it on Saturday I have since cooked 4 recipes:

garlic confit

roasted yams/butternut squash with honey, red pepper flakes and lime yoghurt

roasted cauliflower with garlic, parsley and vinegar

roasted fennel with orange and crushed red pepper flakes)

I plan to cook a 5th (grilled squash with mint-pomegranate pesto, which is on the front cover below) tonight, so I guess you could say I’m rather smitten with the book.

For those of you in the dark, Gjelina just so happens to be one of my favourite restaurants in LA. As it says in the book cover: “In Southern California, there’s no restaurant that better expresses the energy and cool excitement of Venice Beach than Gjelina” and I couldn’t agree more. It epitomises grain and vegetable centric, globally inspired cuisine, which suits me down to the ground. It has echo’s of Ottolenghi’s tomes – think za’atar and pomegranate molasses infused dishes – but the thing I automatically liked about it is that the recipes are those you actually want to cook and share with friends and family, also they are dead easy and if you don’t have an ingredient you can ad lib and make your own additions. The photos and props are also definitely the style that I love.

I have a large pot of garlic confit sitting in my fridge now, like the one above. I can’t wait to make their version of mushroom toast – I mean how divine does it look?. This would definitely appeal to my father who also has a deep fondness to mushrooms, like myself.

So last night I made the ‘roasted fennel with orange and crushed red pepper flakes’. I couldn’t find any blood oranges so I used a regular orange. I also played around with the measurements here and there to suit me. The final dish was delicious and is perfect with a roast chicken, fish or perhaps some other vegetable dishes. Great for summer gatherings. Give it a whirl and let me know what you think.


Roasted Fennel with Orange & Crushed Red Pepper Flakes 

2 fennel bulbs, cut into wedges and the stem into thin slices, reserve the fronds

1 large orange, peeled and cut into segments

60ml extra-virgin olive oil

flaked sea salt

80ml fresh orange juice

30ml masala wine (they use 60ml of white wine but I none to hand)

60ml of vegetable stock (I used my homemade poussin stock which is so flavoursome)

pinch of crushed red pepper flakes

freshly ground black pepper

  1. Prepare the fennel bulbs and then in a large frying pan warm the olive oil. When it is hot add the fennel wedges so that the cut sides are against the bottom of the pan to get a good sear.
  2. Cook until the fennel is caramelised, which takes about 3 minutes. Turn over, using tongs, and caramelise the other side for a further 3 minutes.
  3. Season with salt and toss in the fennel stems and continue to cook for another 2 minutes so the stems are well-browned.
  4. Now add the orange juice, wine and stock and let reduce do that the sauce thickens and the fennel is seared and starting to softened – this should only take a couple of minutes.
  5. Add the red pepper flakes and season with salt and pepper.
  6. Pour onto a serving platter and garnish with the fennel fronds, orange segments.

Serve warm or at room temperature.

Super easy and super delicious. I hope you agree.


Speedy Indian Salmon Curry

Exhausted after a long day, with little energy or inclination to cook a complex dish that involves lots of marinating and blending? We’ve all been there right? Well this curry works a treat and literally takes 15 minutes to prepare and cook.  It’s a staple dish in my household and is always guaranteed to raise spirits and a smile. I’ve been cooking it for 20 years so felt it would be a good one to share with you all. I have used salmon but you can equally use trout or any firm fish in fact.

I find I use all the spices quite regularly so am guaranteed to have them in the house. My fridge also always has fresh ginger and curry leaves, which are either kept in my fridge of freezer (so I don’t get caught out). Same goes for fresh chillies.

I think you’ll be pleasantly surprised at how quick and easy this dish is and yet tastes really moreish. I often get asked do I eat the curry leaves and the answer is ‘yes’. I love the taste of them, but you can leave them to one side if you don’t fancy it. They will have already worked their magic flavouring the dish.

I often accompany it with some of my Bengali dal, which is my ultimate comfort food. A plain white or brown rice works well with this dish.

I would love to see how you get on so don’t forget to tag and link me on instagram if you make it @chilliandmint #chilliandmint.


Speedy Indian Salmon Curry

Serves 4

700g filleted salmon, cut into manageable portions (skin on or off as you prefer)

2 tbsp vegetable oil

1 medium onion, chopped

1 tsp nigella seeds

1 small tsp turmeric powder

1 tsp coriander powder

1 tsp cumin powder

2 fresh chilli, chopped in half (more if you like it hot)

half tsp chilli powder (optional)

2 inches  fresh ginger, peeled and grated

approx 10 fresh curry leaves

2 large tomatoes, finely diced

150ml water

1 tsp salt

handful of fresh coriander

1. Cut the salmon pieces into manageable sized portions and put to one side.

2. Warm the oil and when it is hot add the onions and fry on a medium heat for 6 minutes or until they begin to brown. At this point add the nigella seeds, fresh chilli, turmeric, chilli powder, cumin powder, coriander powder, grated ginger, curry leaves and salt and stir for 20 seconds.

3. Add the tomatoes and 100ml of water and mix all the ingredients together.

4. Gently place the salmon pieces, with the skin facing upwards (if skin is still on), into the sauce and let it simmer on a medium/low heat for 5 minutes. Place a lid on the pan.

5. Then using a spoon turn the salmon pieces over and add a further 50ml of water if necessary. It will only need a couple of minutes. If you prefer a thicker sauce add less water and vice versa. Its really not an exact science and more down to personal taste.

Serve with roughly chopped fresh coriander.


Aloo Matar – Potato and Pea Curry

Increasingly I am eating more and more vegetarian dishes (and fish) throughout the week. Has anyone else found that their meat/veg ratio has changed quite a lot in the last couple of years? I do still eat meat, but certainly not every day. I find it immensely helpful to have a number of go-to vegetarian recipes up my sleeve, so thought I would share this one with you. It’s a good one for the whole family as it is spiced but not spicy. Invariably I always have potatoes, tomatoes and frozen peas in my house, so this recipes is an easy one to whip together at a moments notice. It’s very similar to a dish that I started cooking way back at university, and in many respects laid the foundation stones for my future Indian cooking exploits.

I know that potatoes seem not to be so in vogue as they once were, like bread, but I still love to eat both potatoes and bread – especially sourdough – in many different guises. Do you have a potato recipe they you always fall back on time and time again? Do let me and my readers know in the comments section below.


Also if you cook this dish please share it on instagram and tag me @chilliandmint so that I can see.


Aloo Matar (Potato and Pea curry)

serves 4 

3 tomatoes, roughly chopped

2 inch piece of fresh ginger, finely grated

2 tbsp vegetable oil

1 red onion, finely chopped

1 tsp cumin seeds

1 tsp coriander powder

½ tsp turmeric powder

½ chilli powder

1 tsp salt

400ml water

3 medium/large potatoes, chopped into 1.5inch pieces (approx)

100g peas

½ tsp garam masala

2 tbsp kasoori methi (dried fenugreek)

1 tbsp fresh coriander

  1. Place the tomatoes and ginger in a hand blender and blend to a smooth puree. Place to one side.
  2. Heat some oil in a pan and add the cumin seeds, they will begin to sizzle almost immediately. After 15 seconds add the red onion.
  3. Gently saute for 5 minutes before adding the coriander, turmeric and chilli powders.
  4. After a minute, add the tomato and ginger puree followed by the potatoes and cover with the water.
  5. Place a lid on the pan and simmer for 15 minutes or until the potato has softened.
  6. Add the peas after 8 minutes.
  7. Just before serving scatter the kasoori methi and garam masala and fold into the potatoes.
  8. Serve with a sprinkling of fresh coriander.


Baingan Bharta – Spiced Smokey Aubergine/Eggplant 

How’s everyone getting on? Not having the January blues I hope. It’s a bit cold and dreary back here in London and snow is  forecast, but I hope that this post will lift your heart and spirits and that you’ll see the world in colour once again. I thought you would be intrigued to see beautiful Jodhpur below. We recently spent a few days in this magnificent city, wandering the streets and soaking up the electric atmosphere.

I’ve been trying out some of the lovely recipes that I sampled in India in the comfort of my warm cosy kitchen this week. I’ll be sharing lots of them with you here on the blog over the coming weeks. Today I wanted to show you a wonderful aubergine dish – or eggplant as it is known to my US followers. It is similar to my baba ganoush, but with an Indian twist due to the spices.

Before I show you the recipe however, I wanted a moment to talk about chillies. I often get asked which chillies I use in my Indian cooking. When it comes to fresh green chillies I opt for the ones that are small and thin – but not the Thai birds eye, which are far hotter. The chillies I buy are slightly largely and longer, but still thin compared to the more bulbous ones.

In Kolkata I visited so many wonderful markets but the one above – Bow Bazaar – which is more of a wholesale fresh produce market, had a magnificent array of fresh produce. These chillies are similar to the ones I buy here in the UK.

So back to the recipe for this week. Please do give it a go and share the results on your social media outlets with the #chilliandmint and link me @chilliandmint.

Have a lovely weekend everyone.


Baingan Bharta – Spiced Smokey Aubergine/Eggplant 

serves 4-6 (served with some other dishes)

2 large aubergines

2 tbsp oil

1 tsp cumin seeds

1 small red onion, finely chopped

1 inch fresh ginger, finely grated

4 garlic cloves, finely sliced or chopped

1-2 fresh green chilli, finely sliced

1 tsp salt, to taste

1/2 tsp turmeric powder

1/2 tsp chilli powder

1 tsp coriander powder

4 medium sized tomatoes, cubed


  1. First you need to place the aubergines over a flame. If you have a gas hob then this works really well. If you do not you can place in the oven for 20-30 minutes, or until the flesh softens, although it won’t have the same smokiness as over an open flame. If you are smoking it over a flame/gas hob it will take around 8 minutes, but you need to use tongs to turn it over so that it is ‘burnt’. Once it is soft and the sides have shrivelled remove from the plan and place on a plate to cool.
  2. Remove the charred skin from the aubergine and run under water to remove any excess skin. Place in a bowl and mash using a fork or potato masher.
  3. In a non-stick pan add the oil on a medium/low heat and add the cumin seeds. Allow them to fizzle in the pan for 15 seconds or so before adding the red onion, fresh chilli, garlic and ginger. Move around the pan to soften for 5 minutes.
  4. Add the spice powders and salt and move around the pan.
  5. Add the tomatoes and aubergine and move around the pan for a further 3-5 minutes.
  6. Serve warm – you can add some fresh coriander on top or eat it as is.

You can serve this at room temperature, but personally I love it hot with a paratha or chapati.


Seven Things to Do When Exploring Jerusalem

Jerusalem is an absolutely fascinating city on many levels. I loved it. Whether you are religious or not, you can’t help but be hypnotised under it’s spell. My advice is to give the city time. Don’t do a whistle stop tour ticking off the usual suspects and leaving within 24 hours. We stayed for three days and to be honest I would have loved a couple more to explore further and just watch the world go by. People watching in this city is something else.

  1. Hire a Guide

Whilst we did a lot of exploring on our own, we did book an excellent ‘Three Religions Holy City Walking Tour’ of the old city via Viator. We lucked out massively on a hugely knowledgable guide called Joshua Levinson. He was absolutely brilliant. Our tour was a group tour and he kept our attention for 7 hours, both my daughters (12 and 9 years old) were absolutely entranced by all his stories and did not once say they were bored.

If you want to book him directly you can contact him via his facebook. You’ll need a comfortable pair of shoes – be warned that the narrow streets in the old city can be slippery if the shopkeepers have washed their steps outside their shops, and a big bottle of water. I also found an umbrella a great way to keep out of the sun.

The old city is divided up into four uneven quarters – Armenian, Jewish, Christian and Muslim and within these quarters there are subdivisions; for example in the Christian quarter you will also find Ethiopian Orthodox Christians living in an area with their own Ethiopian Monastery Church and dwellings.


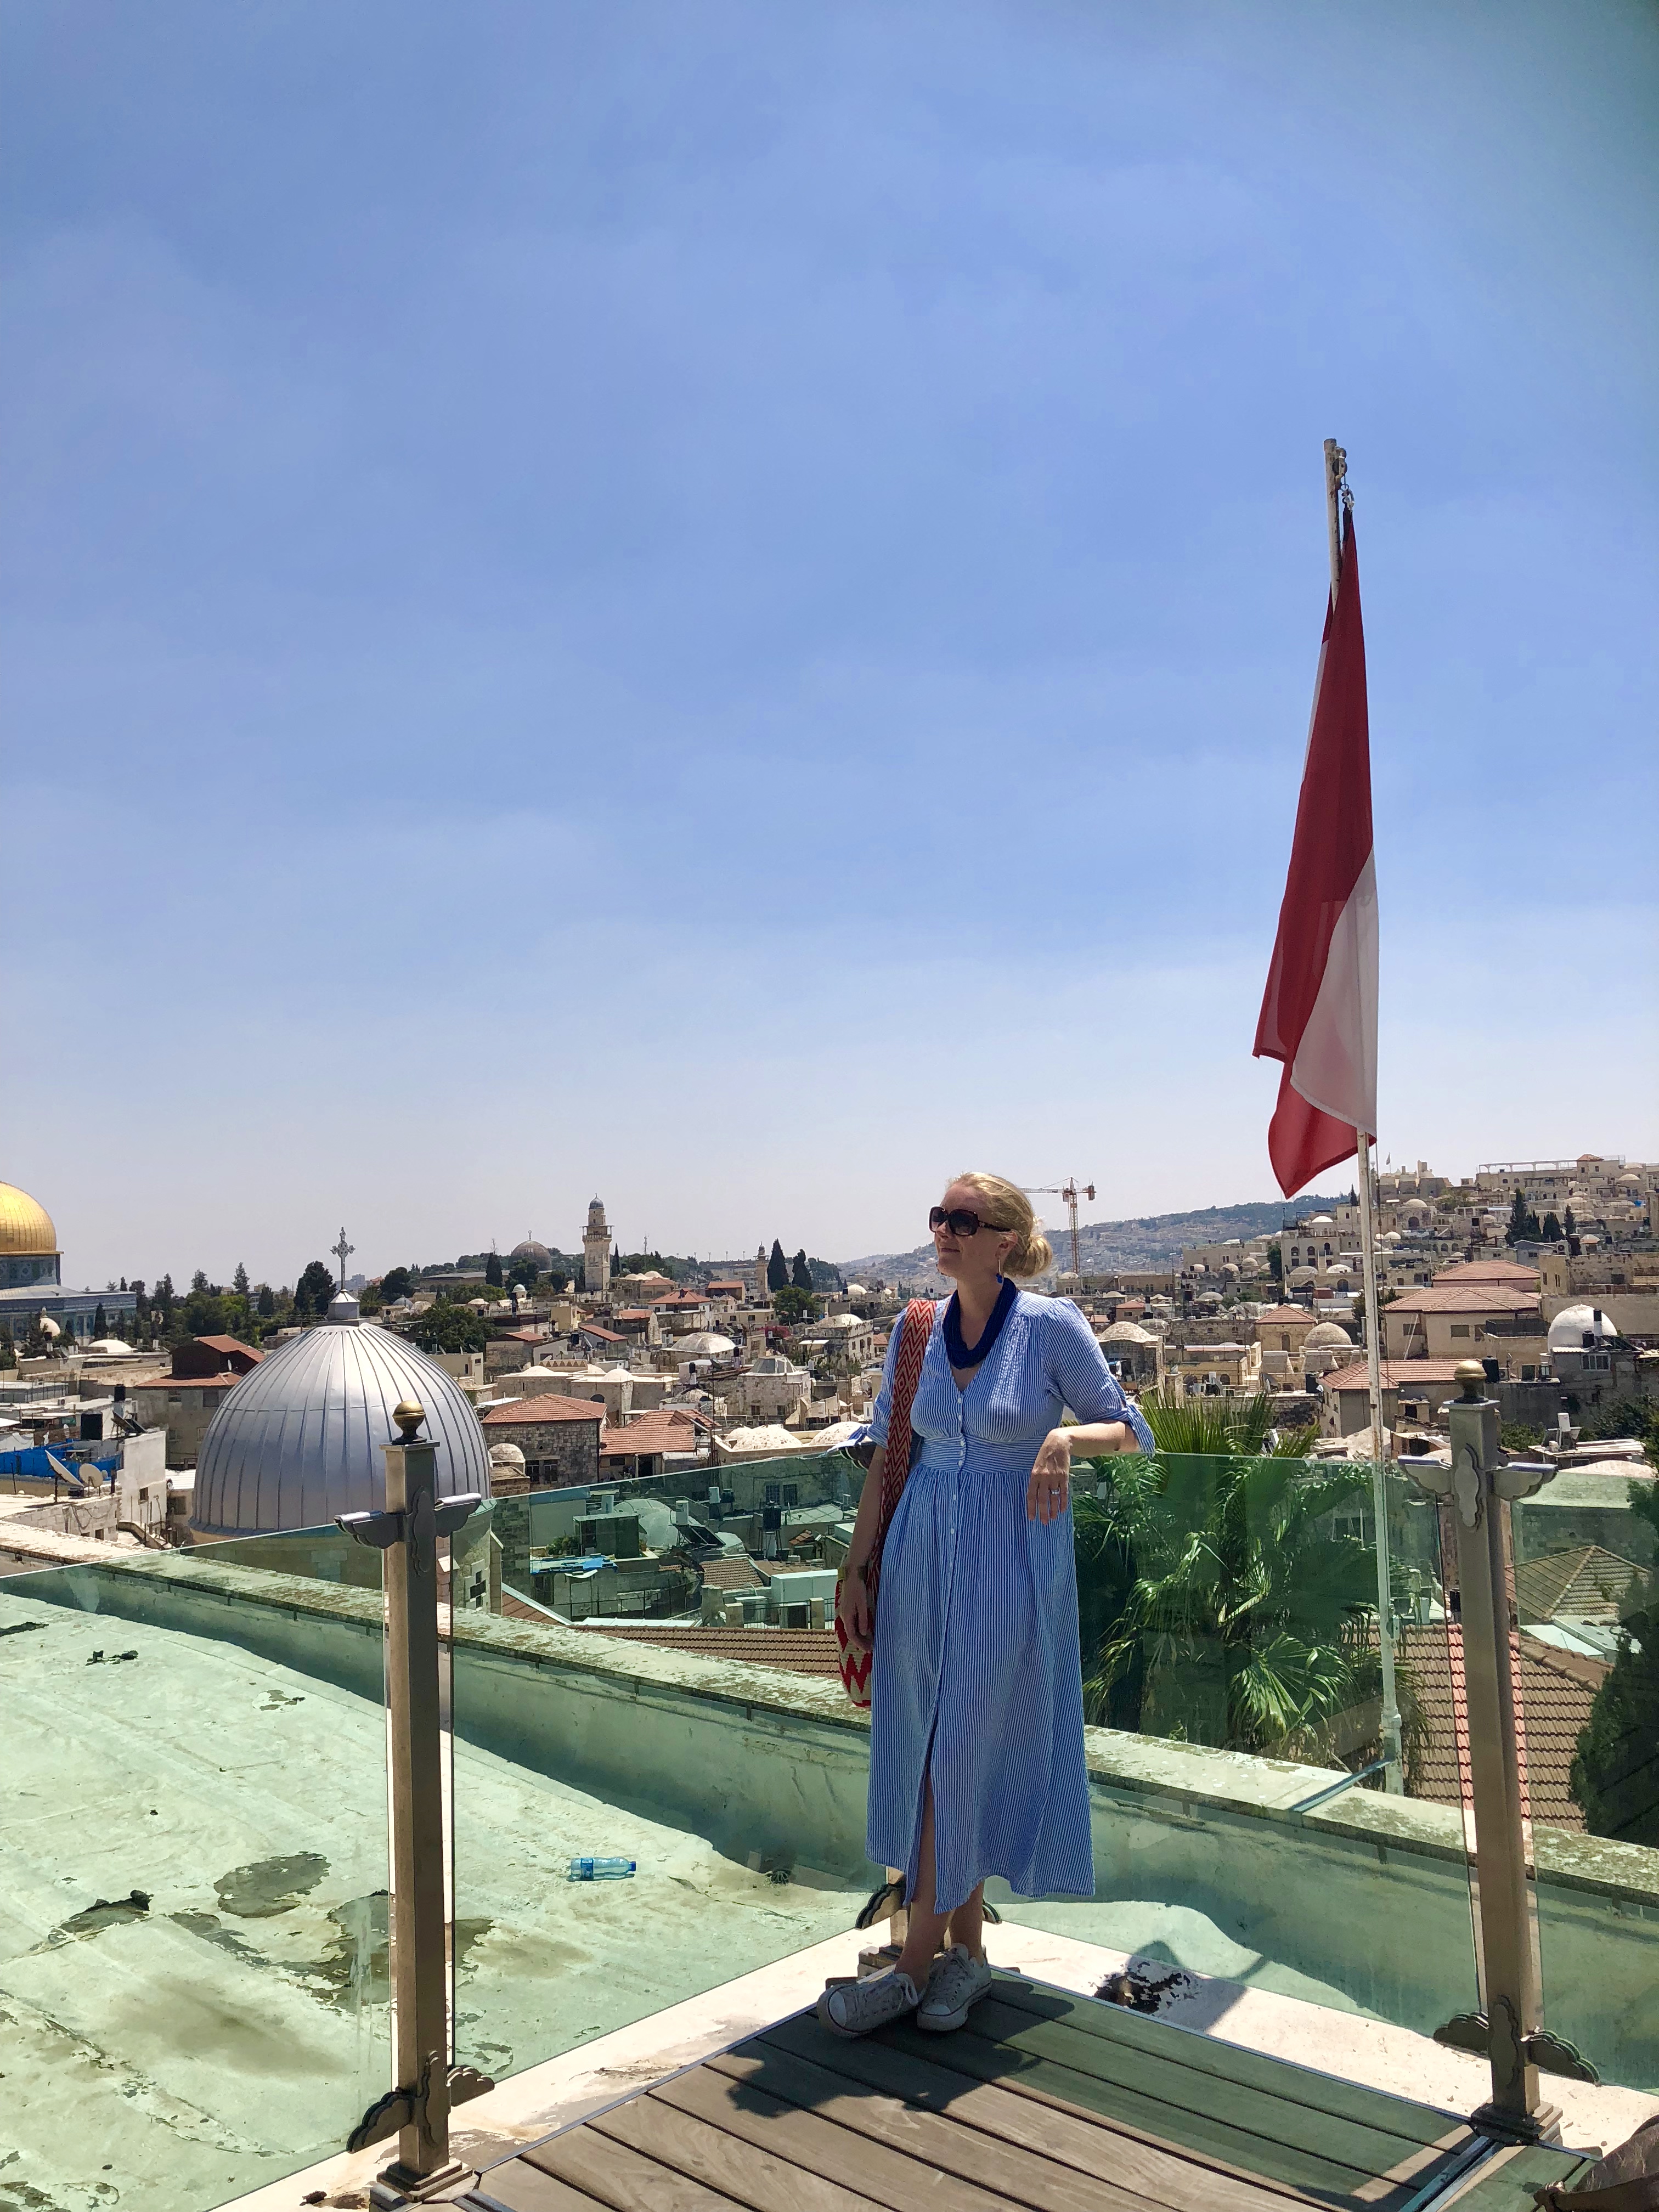
2. Tea at the Austrian Hospice

Take some time out from the hustle and bustle whilst exploring the old city and go to the Austrian Hospice for tea, sachertorte and apple strudel.  Seriously. Sure it’s surreal eating these Austrian fancies in Israel, but I think it’s these things that adds to its charm. It’s based directly on the Via Dolorosa (the road that Jesus walked on carrying the cross to his crucification).  Built in the style of Vienna’s Ringstrasse palaces, once you’ve found the buzzer to open its large looming doors you’ll be greeted by a peaceful oasis. You can also stay here as well – it’s perfectly located in the middle of all the action, but peaceful at the same time. As a visitor you can also go on to the roof, which affords beautiful views across the old city.

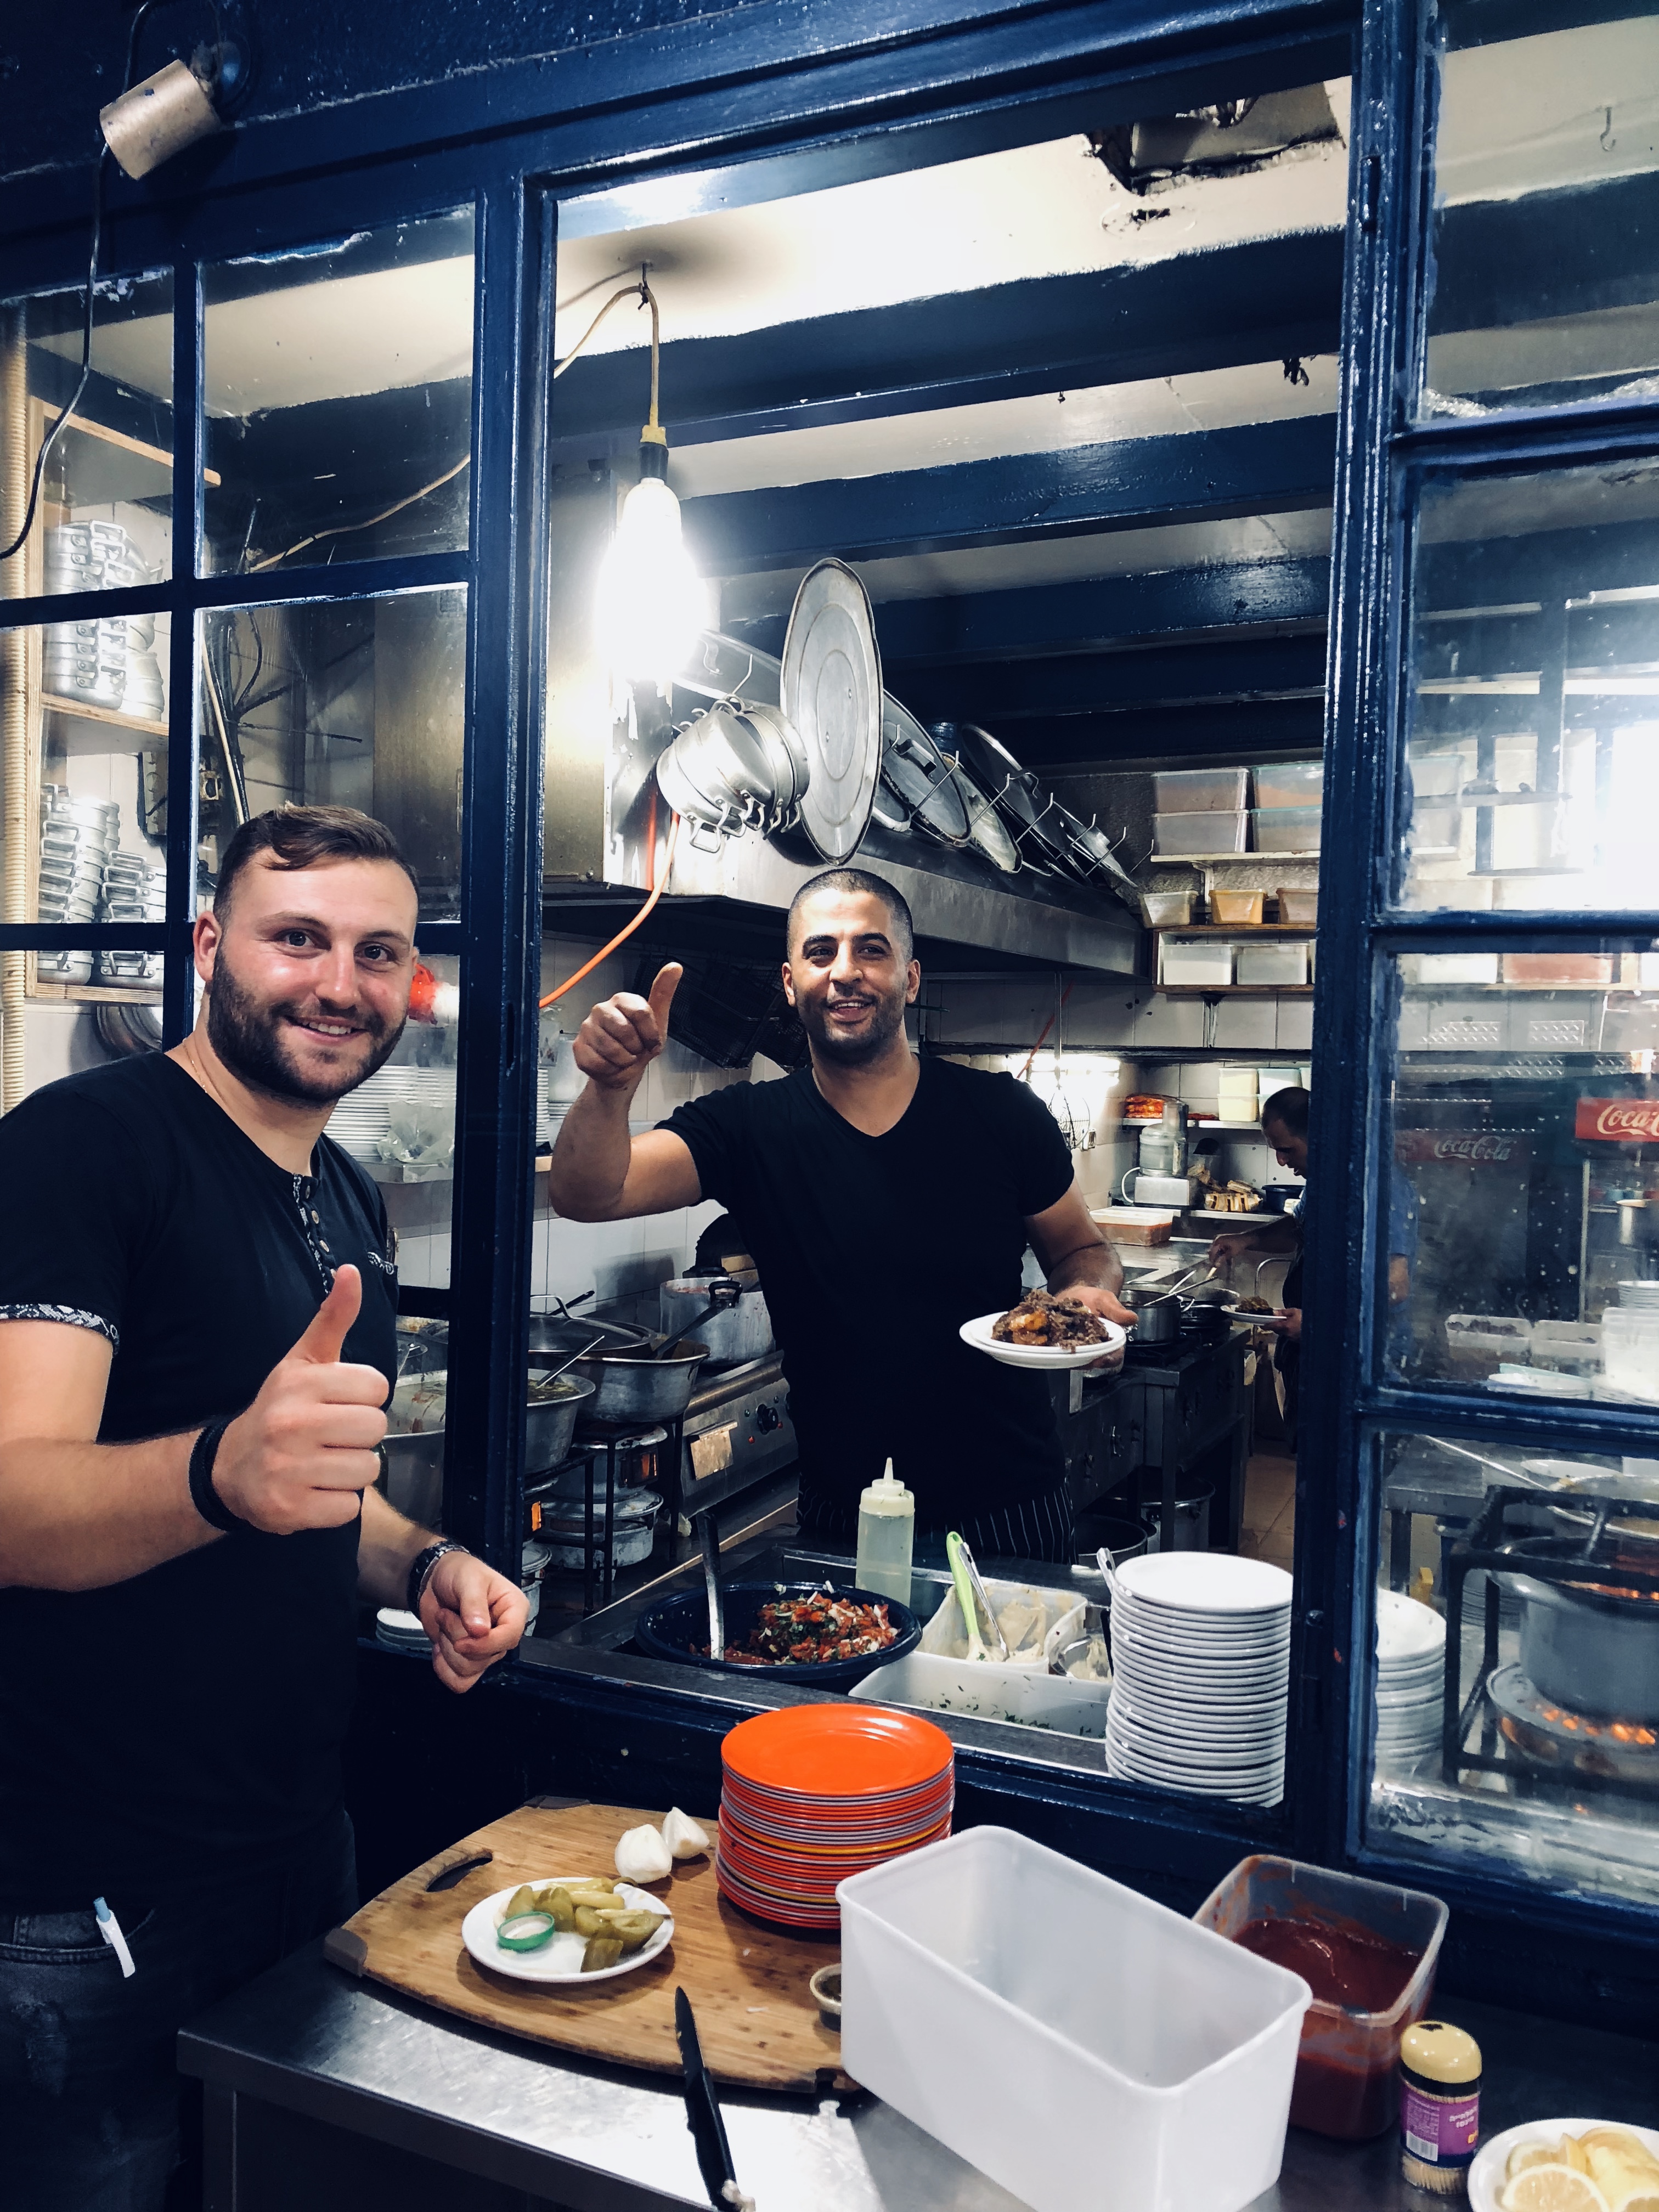
3. Try some Middle Eastern Jewish Food at Azura

Modern Jerusalem is culturally rich with a wide range of ethnic backgrounds living together. The food at family-run Azura, located in the middle of the Machine Yehuda Market, or shuk, is an unforgettable experience. It has Iraqi, Kurdish, Turkish and Tunisian influences and the result is sublime. On our first visit (yes we returned it was so good) we felt the best way to experience the menu was to try the tasting menu – obviously! The portions are still large, not your usual tasting menu size, so we ended up taking a doggie bag of goodies home to have for supper.

Highlights from the menu were Azura – Turkish eggplant filled with ground beef and pine nuts in a special sauce with cinnamon, okra with tomatoes, Mejadara – a rice and lentil combo, beet kubbeh, a glorious soup made with beet, celery and swiss chard, the meatballs in a tomato sauce, beef sofrito and of course the hummus to kick off the proceedings.

The staff were great, the owner – Moshe – incredibly affable and warm and the food delicious. If you aim for a late lunch getting a table won’t be tricky. It’s closed for supper, but lunch goes on until 4pm. Also don’t go on a Saturday as you’ll find it closed.

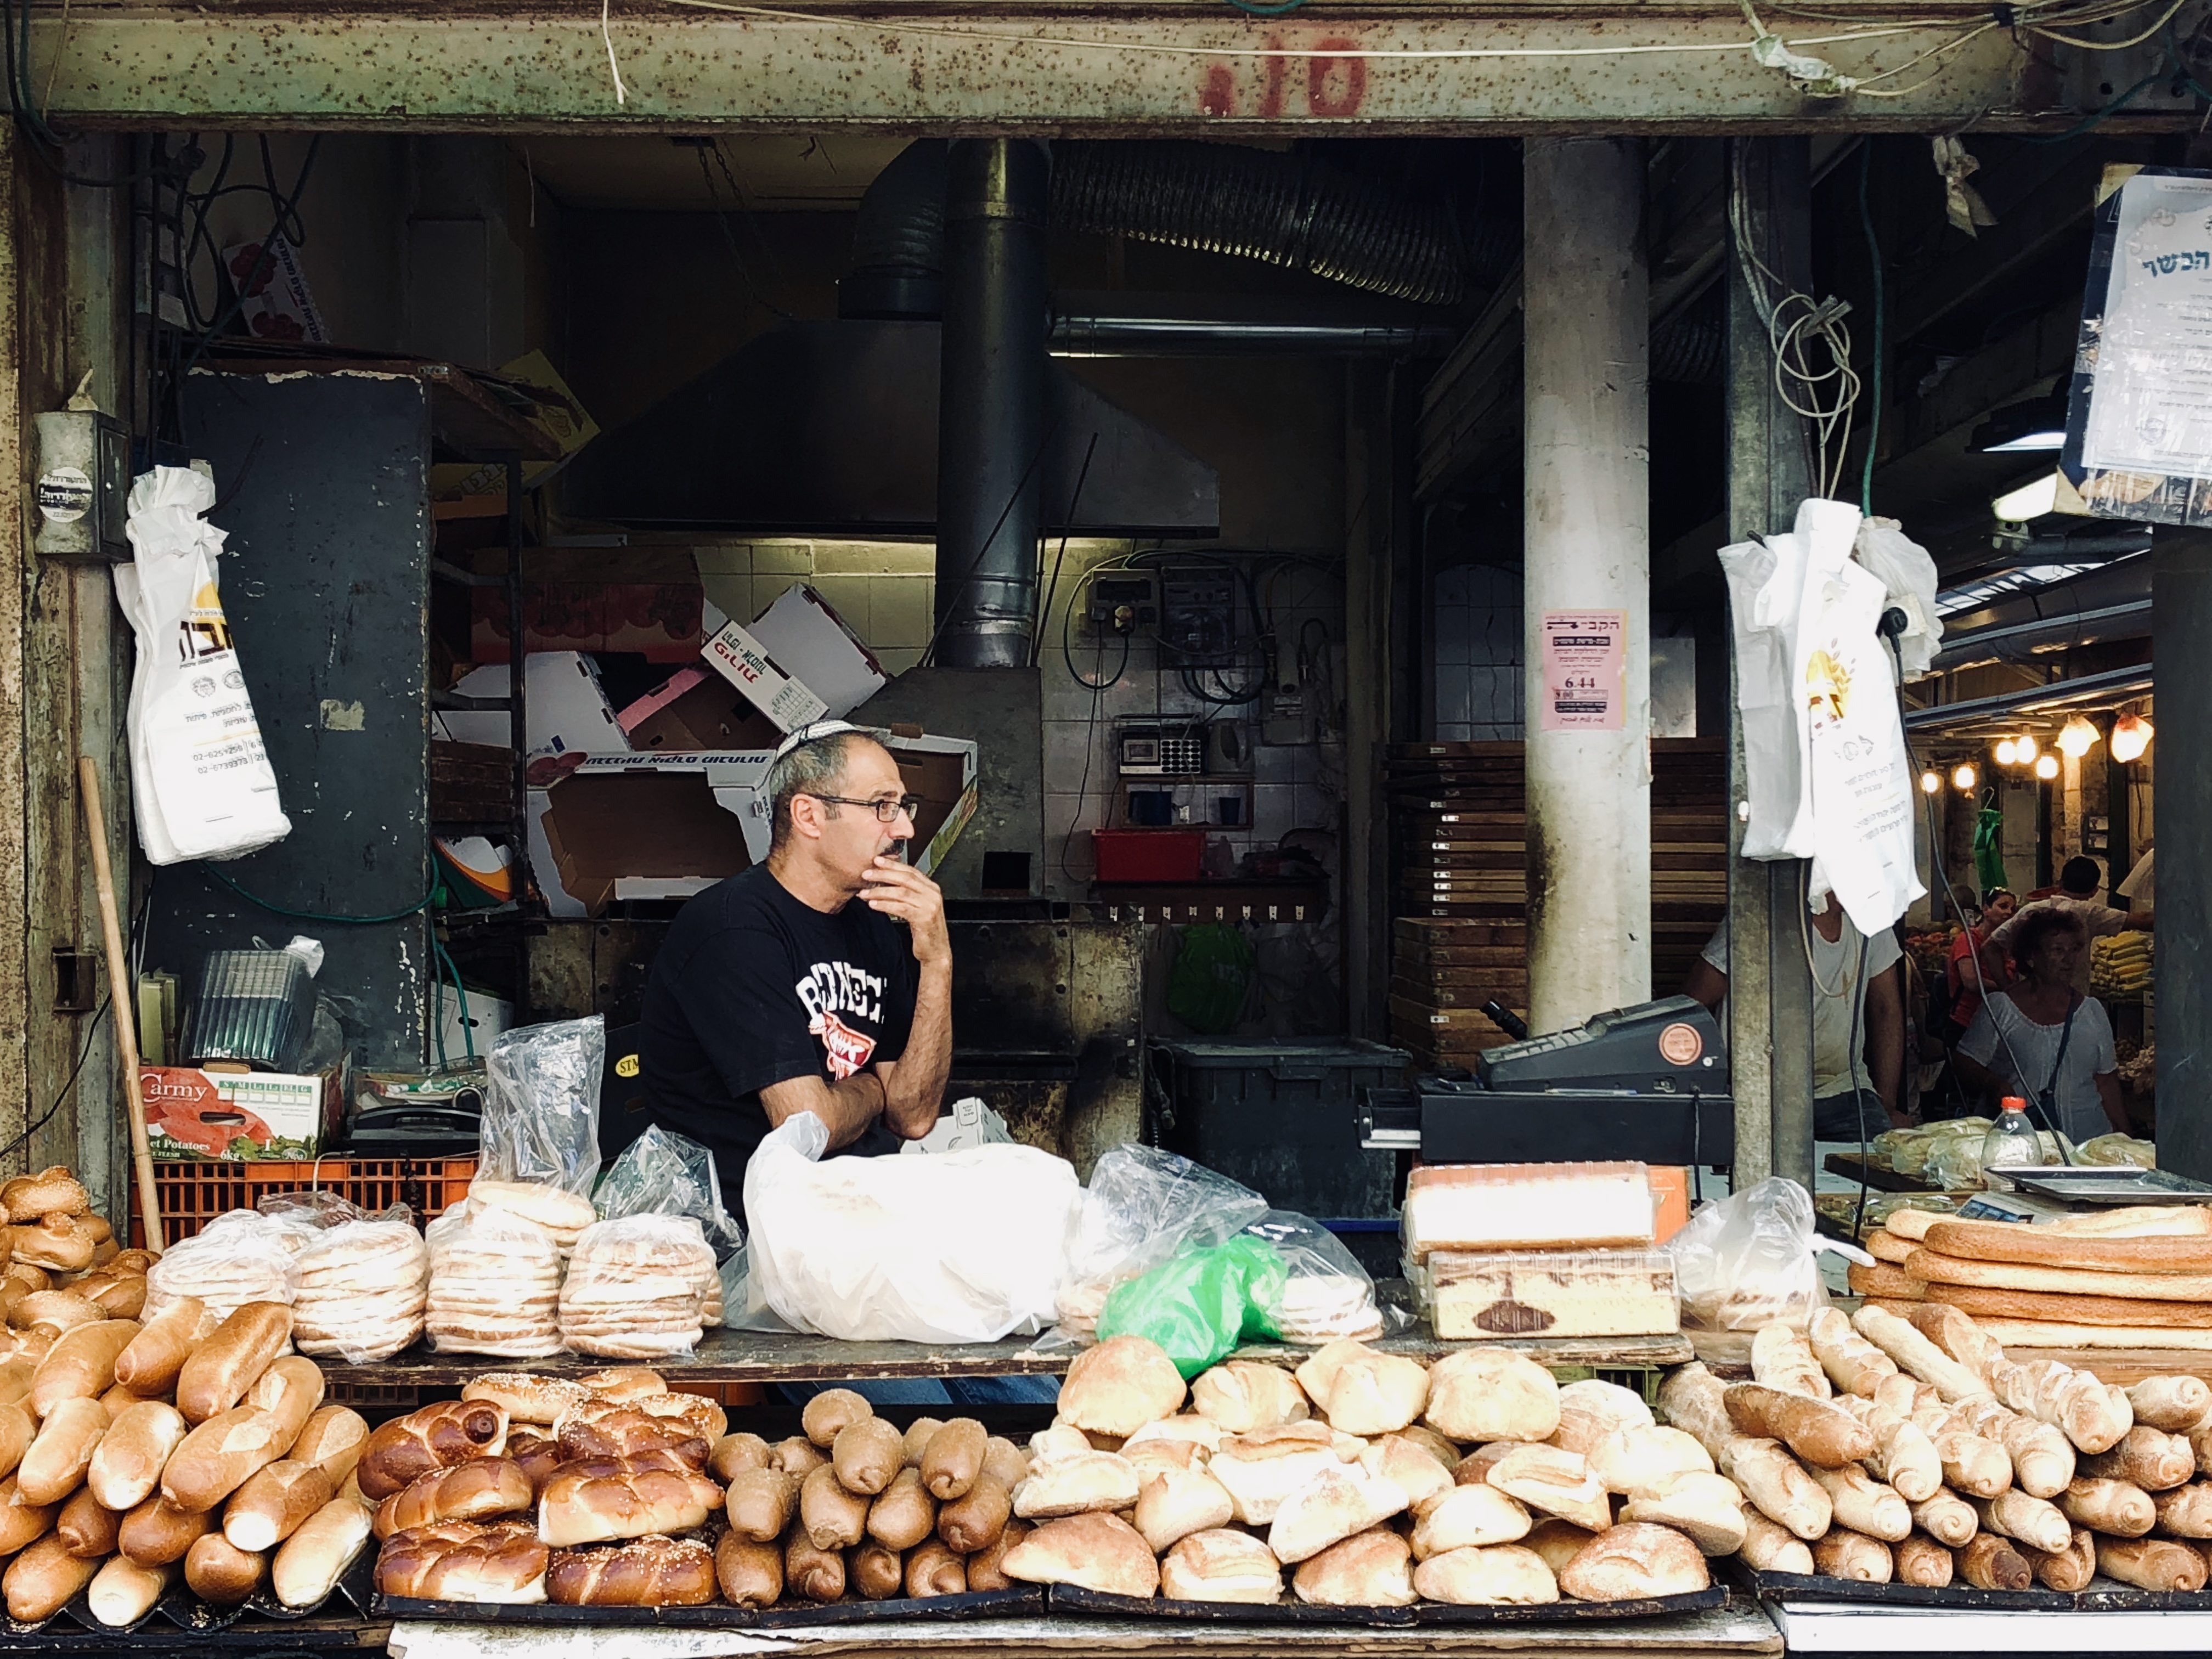
4. Linger in Machane Yehuda Market

Since you’ll be going there anyway to visit Azura, make sure you leave time to properly explore the Machane Yehuda Market. It’s the largest in Jerusalem with over 250 vendors selling a wide range of food and clothes. There are also a number of bars within the market, which even at 5pm were pretty buzzing. The sights, sounds and smells are hypnotic and its a great place to feel the vibe of a Middle Eastern style market. If you are staying in an Airbnb and want to cook at home then it’s also a great place to pick up some delicacies.


There are a number of food tours available, but it just so happened that the lovely lady, Aliza Press, who welcomed us at our Airbnb (who was a friend of the owners who were away), was a chef and she offered food tours as well as being a private chef. If you drop her an email to AlizaPress@gmail.com she can arrange a time to show her beloved city from a food perspective. Sadly due to timing I could not take her up on her offer, but when I return, I will be certainly be getting in touch. Mention my name and my blog if you get in touch with her.

5. Go eat Pizza and Panzanella at P2

Yes….. seriously….. you read correctly. P2 on Keren HaYesod Street is a small (max 20 covers), unassuming little restaurant where most of seating is up at the bar watching the chefs make the pasta and pizza from scratch – literally. The menu is short, as all good menus should be, but the quality of the food was spot on. We were in awe at the one waiter who served out the tiramisu, made the lettuce salads, served and cleared plates like a whirling dervish, took orders and settled bills for the whole restaurant; it certainly created a buzz. The panzanella salad was the best I’ve eaten – so make sure to order one to share before your pizza. Photo of said salad below.

Below is my take on the wonderful salad that we ate at P2 and the recipe to follow. The combination of the crunchy old toasted baguette, onion rings, cucumber, the creamy mozzarella, salty black olives, fleshy tomatoes, work so well with the sherry vinegar dressing.


Panzanella Salad

serves 4

4 medium tomatoes, quartered

1 cucumber, cut at diagonal angles

1 small/medium white or red onion, finely sliced

3 tbsp black stoneless olives

2 mozzarella, broken up into bite size chunks

12 small pieces of day or two old baguette, cut into bite sized pieces (I used white petite ficelle hand cut bread that I found at Waitrose)

1 tbsp olive oil

handful or two of fresh basil leaves

*********

vinaigrette 

3 tbsp extra virgin olive oil

1 tbsp sherry vinegar

1/4 tsp dijon mustard (optional)

1 tbsp lemon juice

salt and pepper


  1. This recipe is mostly a case of compiling ingredients. Make sure you cut the cucumber into diagonal bite sized chunks. The different shapes of the ingredients really makes this dish. Place all the ingredients in a bowl.
  2. Using a pan, dip both ends of the bread in the olive oil and heat in the pan so that it begins to bronze and slightly char, turn over to bronze the other side and then remove. Place into the bowl with all the other ingredients.
  3. Prepare the vinaigrette in a separate small bowl.
  4. When ready to serve gently toss the vinaigrette over the salad and place in a large bowl for people to serve themselves.

Delicious hey!

6. Deciding Where to Stay

There are lots of options on where to stay in Jerusalem. For us it made sense to book an Airbnb and I found a beautiful apartment in Talbiyeh, a good 15 minutes walk to the Jaffa Gate. The area is safe, quiet, with tree lined roads with beautiful grand houses. Below is a photo of the outside of our apartment.

If a hotel is what you are after and perhaps one with a pool, then The American Colony might be a stylish option. The Austrian Hospice, that I spoke about earlier in this post, looked lovely and might be a good option if you are travelling as a couple or solo traveller. This article by Vogue also has a few other good options.
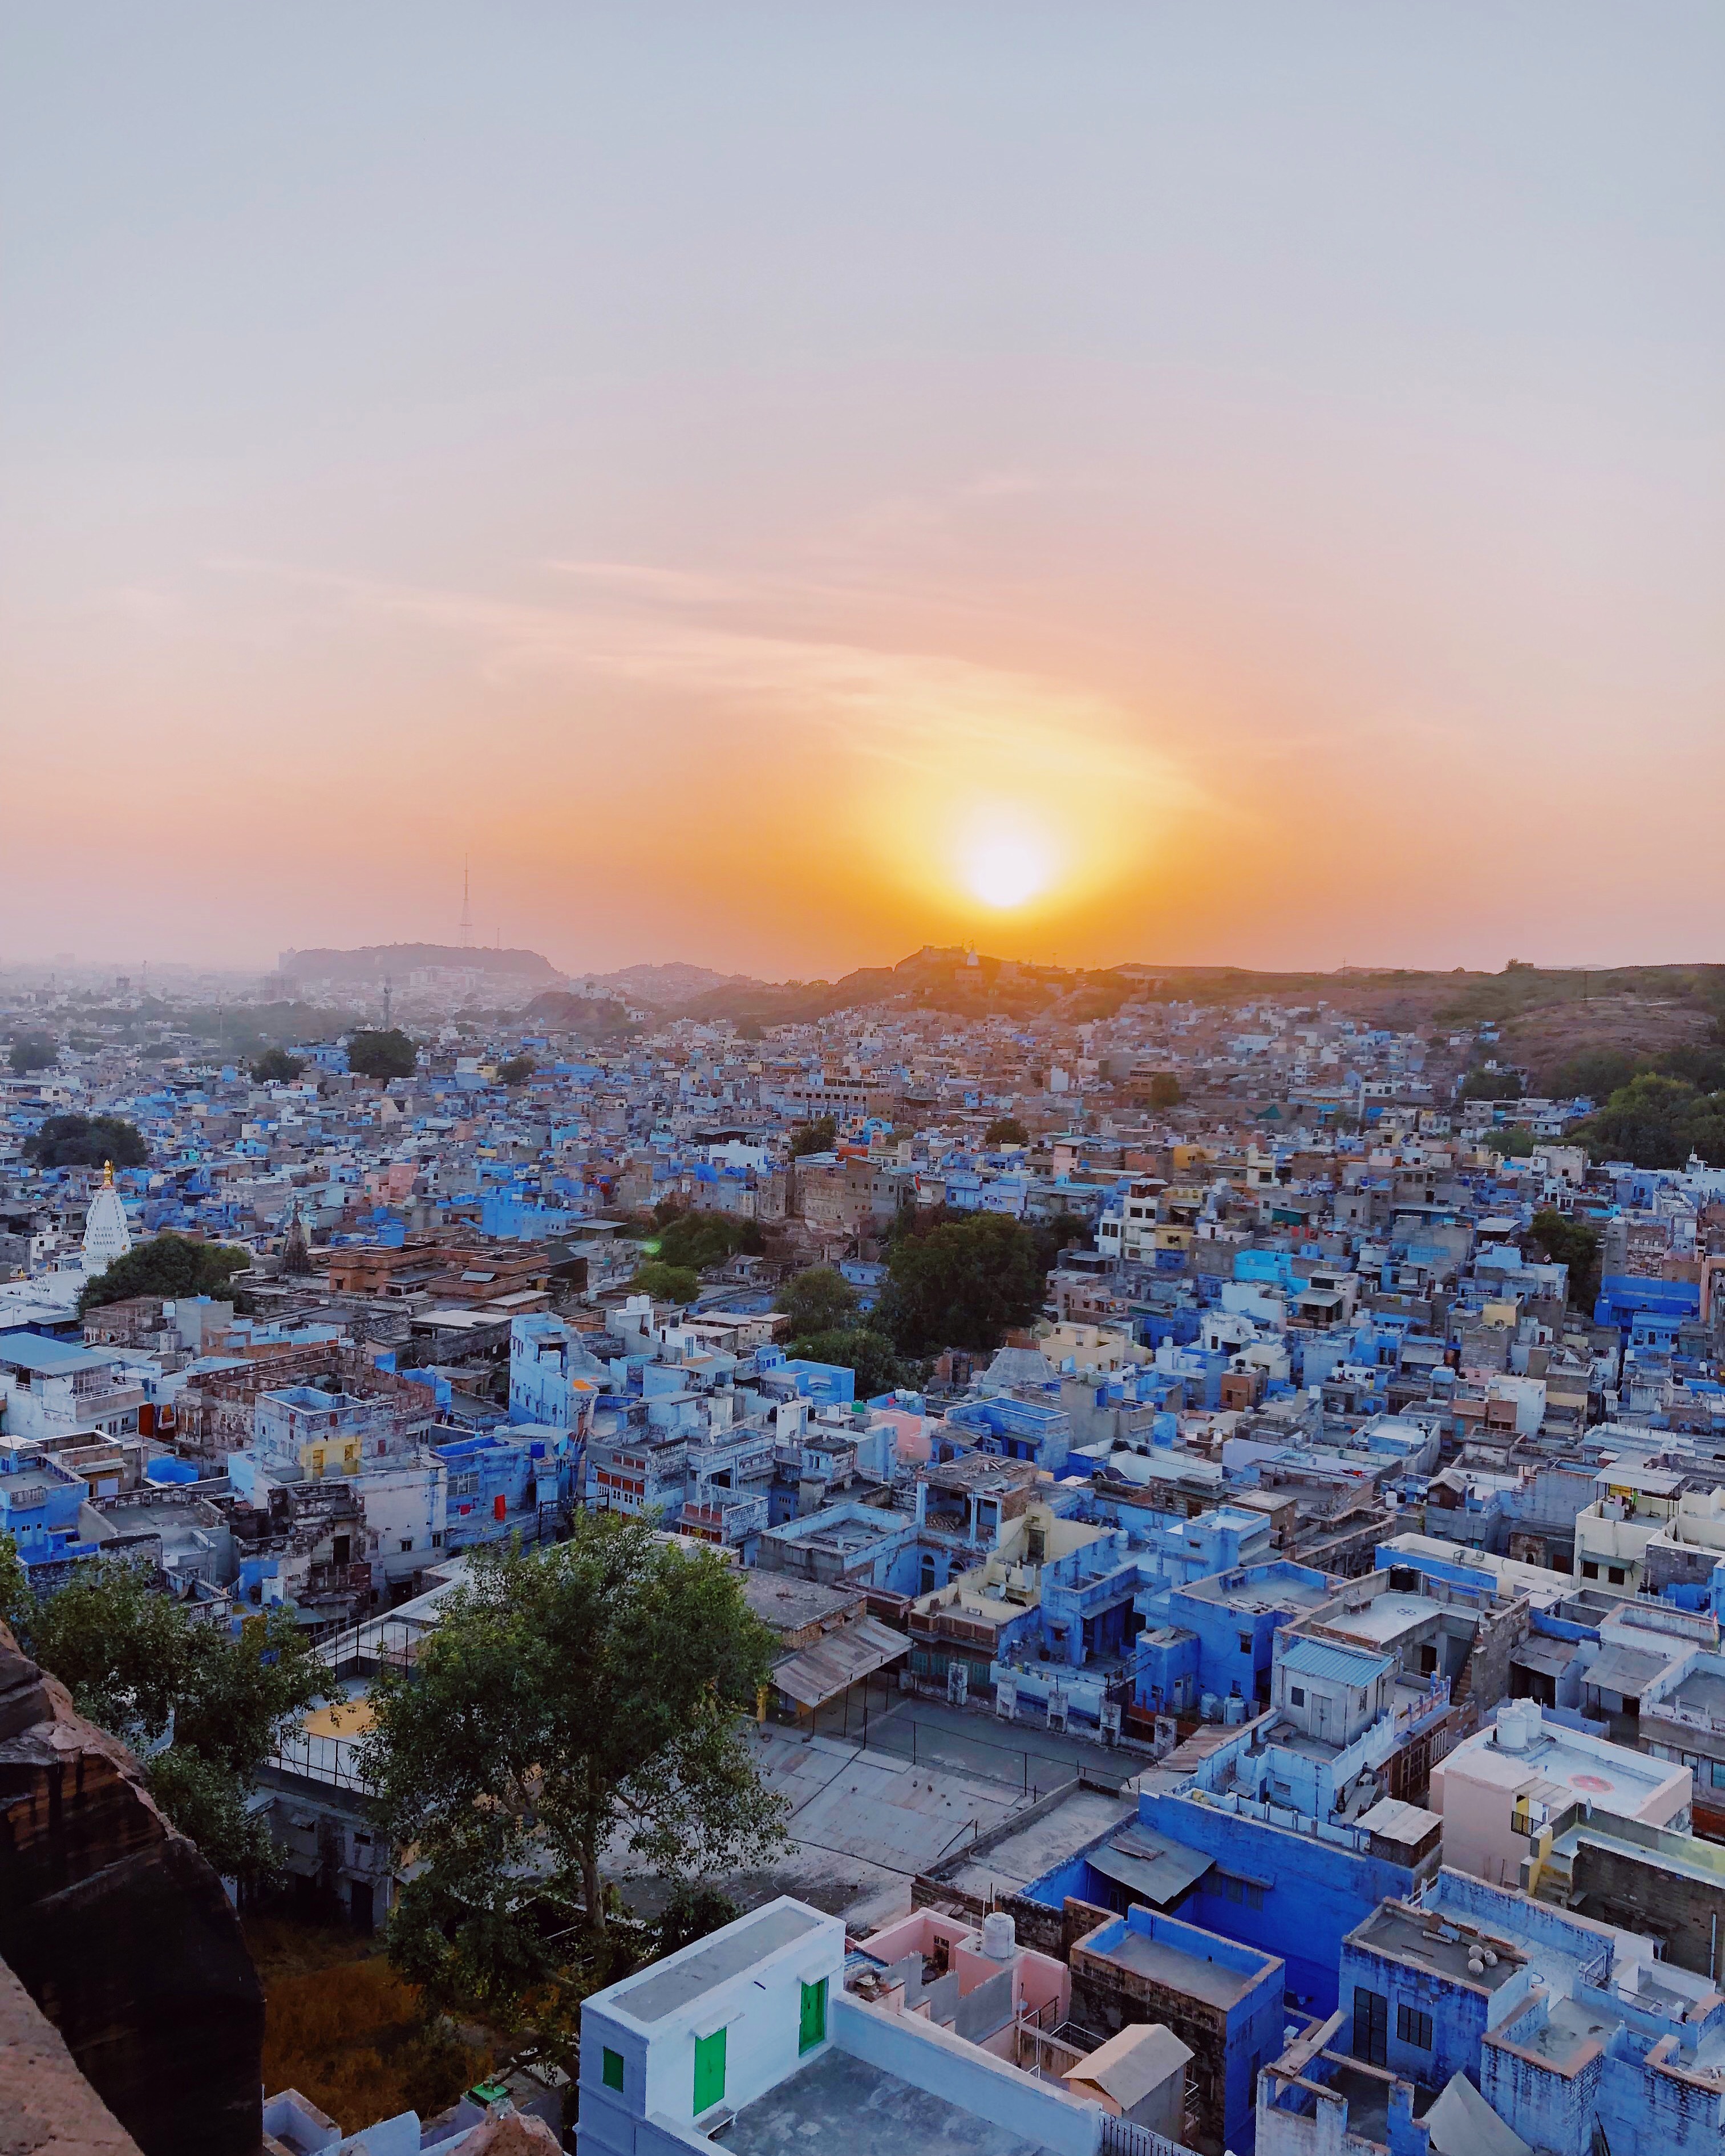
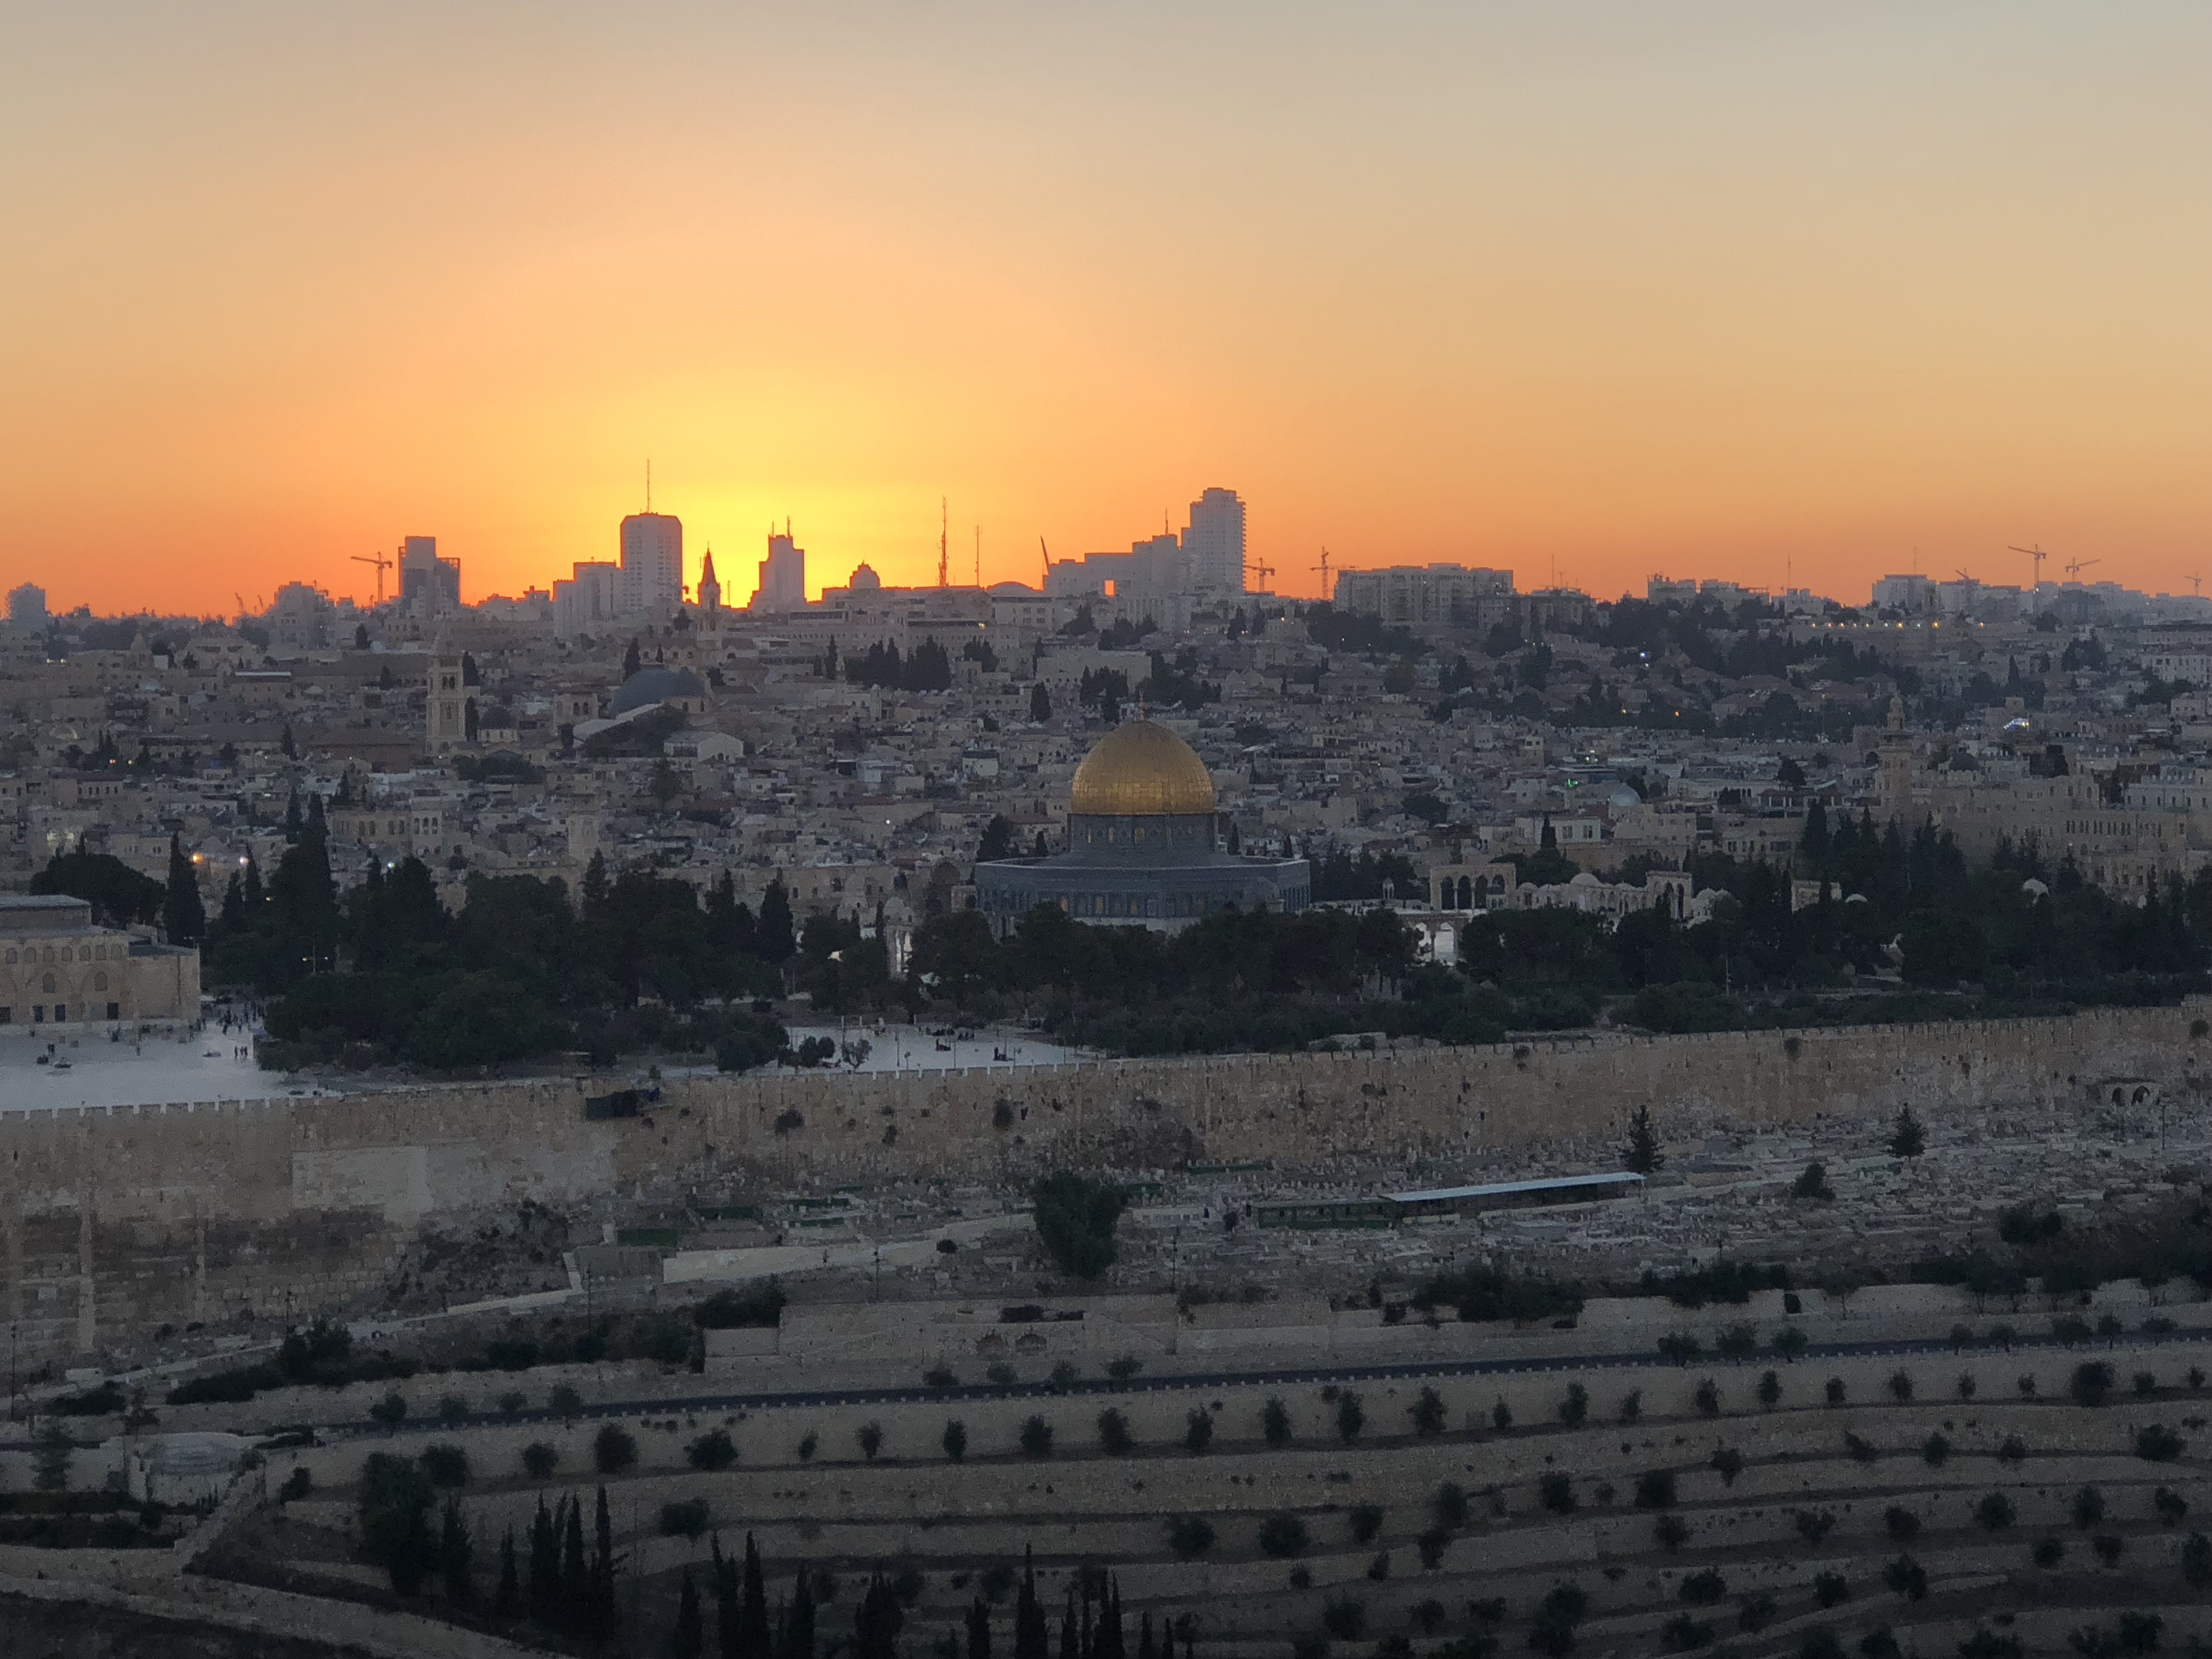
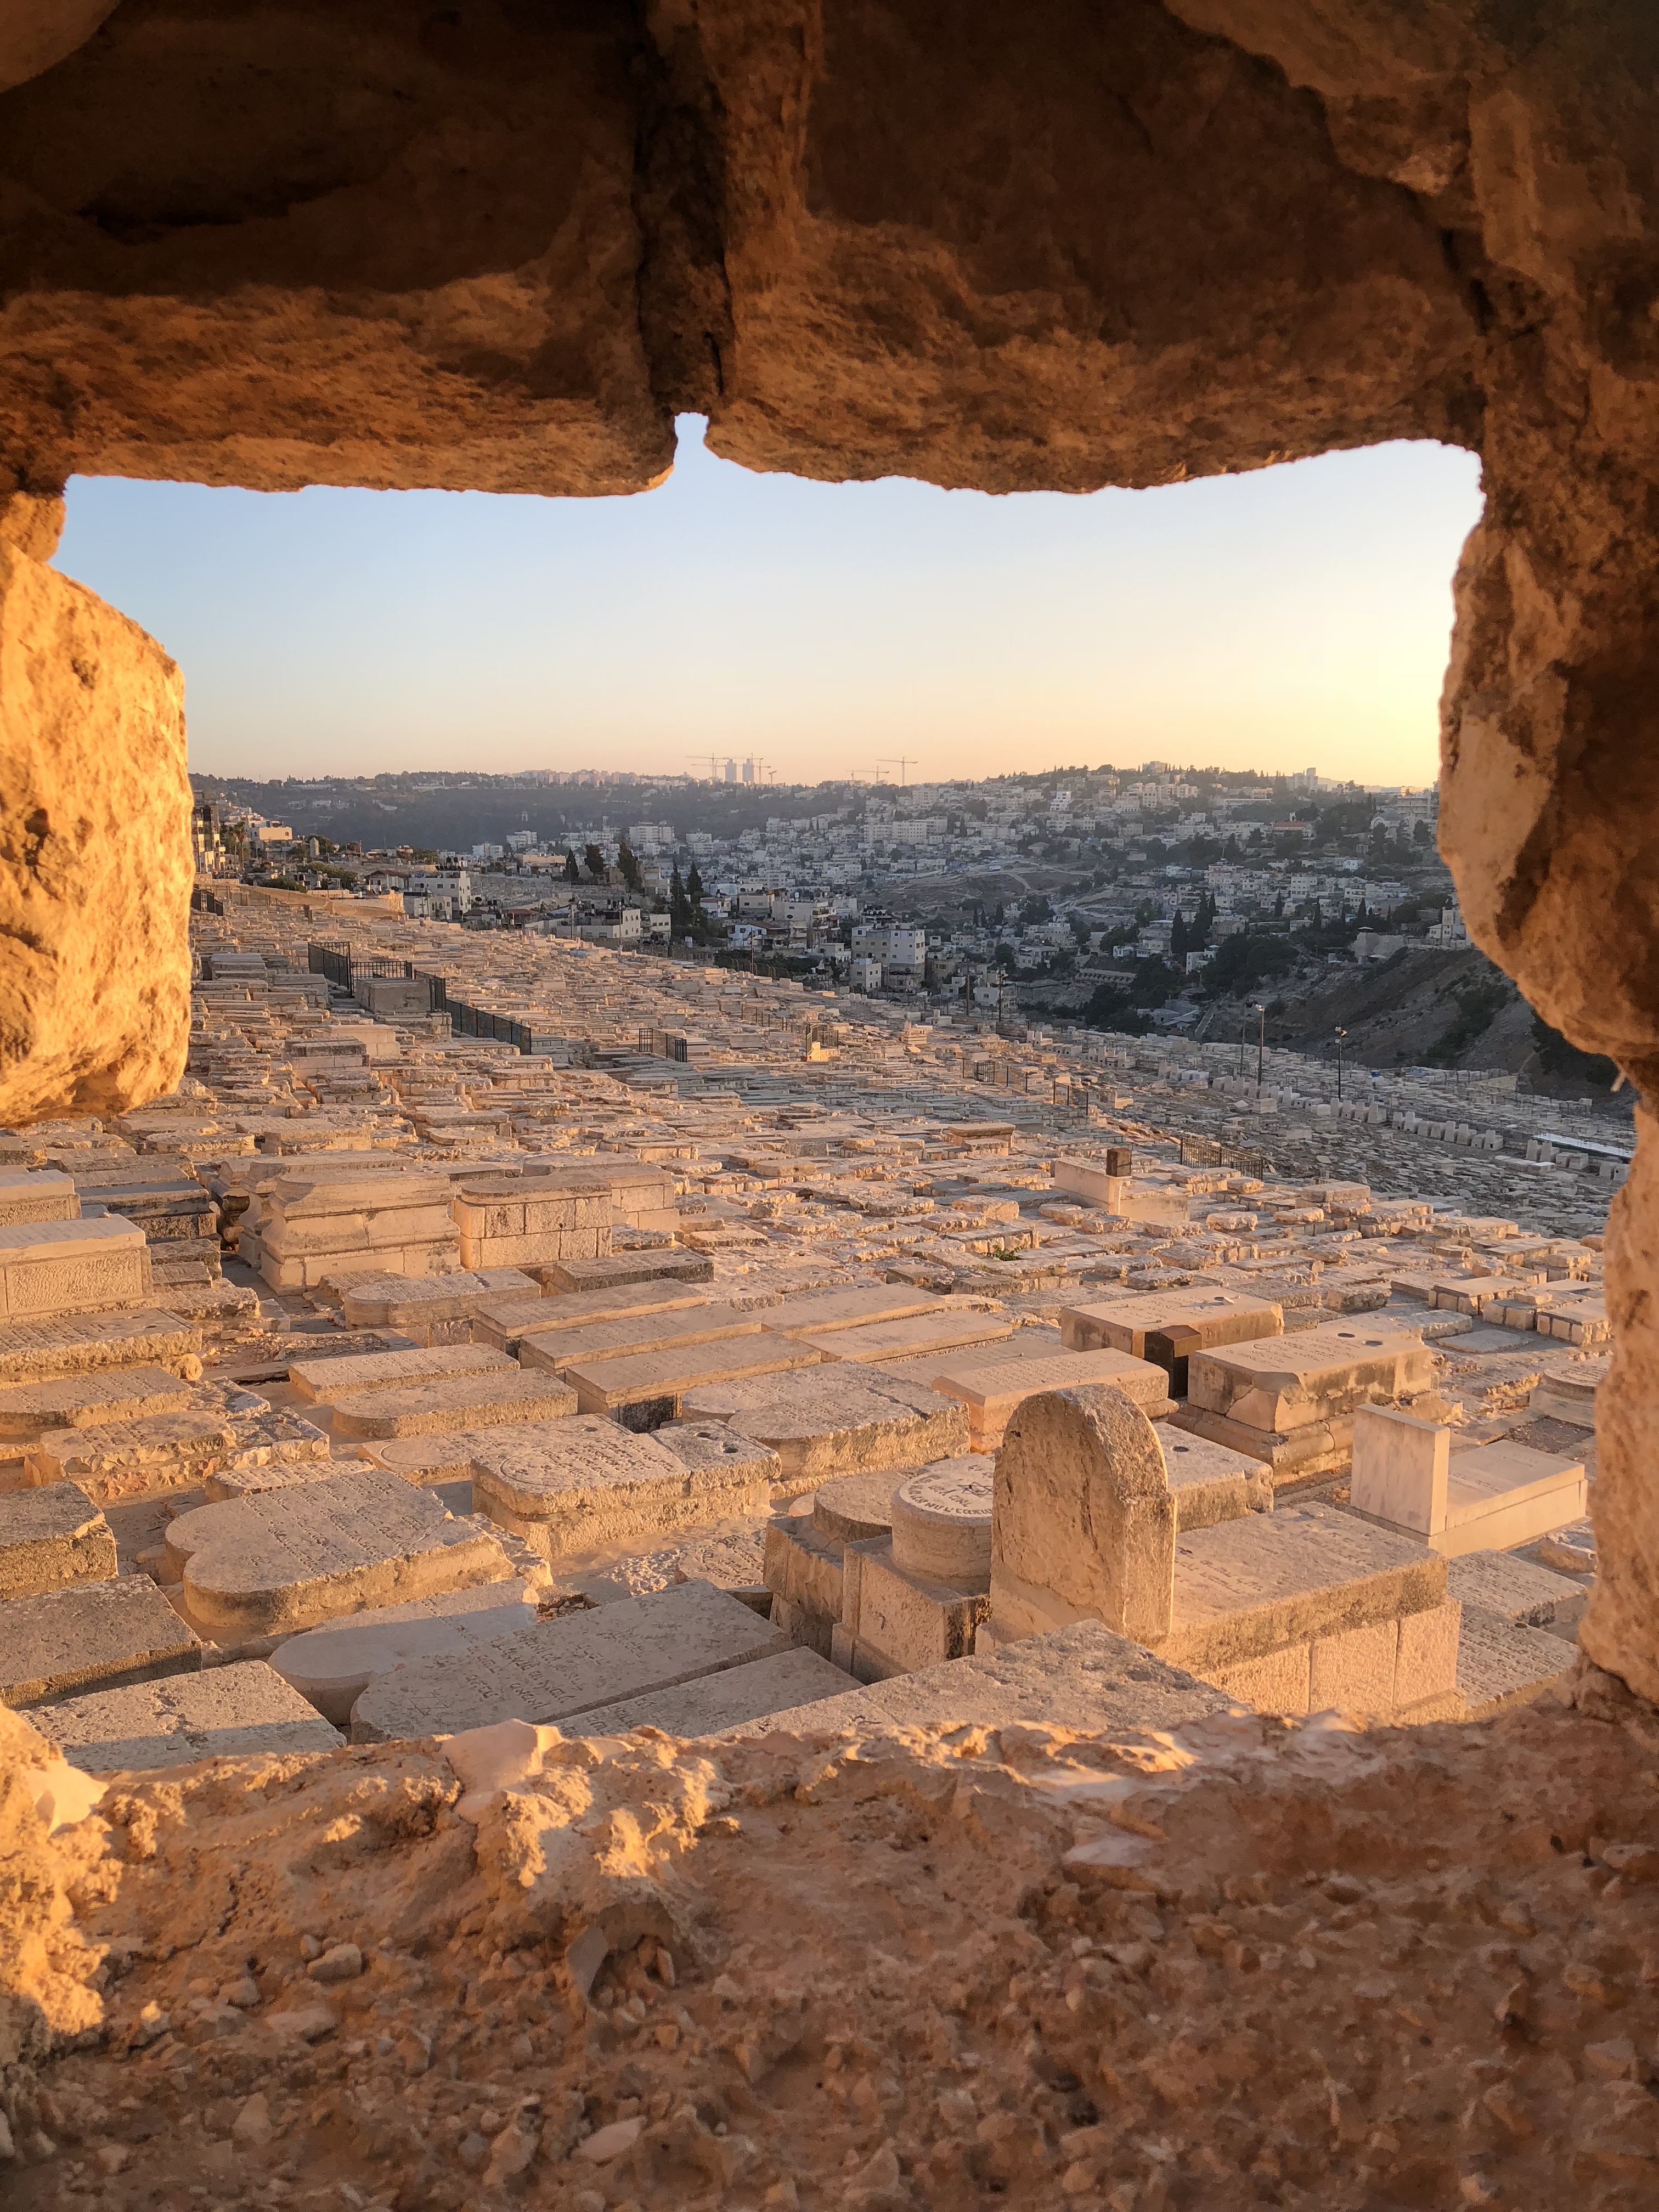
7. Sunset at the Mount of Olives
Walk up to the Mount of Olives just before dusk to watch the setting sun over the old city. Yes it’s a step – ish climb, but you will be rewarded with a truly beautiful sight. It’s a 15/20 minute walk from Lions Gate in the old city. The walk takes you pass the Garden of Gethsemane as well as the Russian Orthodox church and convent (photo above). It’s a great way to work up an appetite before supper.
There are taxi’s at the top, if you don’t want to walk down, but the evening was so balmy when we were there that we continued down on foot to walk through the old city once the crowds had made their way home.
Jerusalem really is an extraordinary city that I would urge you to visit if you get the opportunity, but don’t get too carried away. I will leave you with these words below written by Lonely Planet about  ‘Jerusalem Syndrome’.
Jerusalem syndrome
Each year tens of thousands of tourists descend on Jerusalem to walk in the footsteps of the prophets – and a handful come away thinking they are the prophets. Jerusalem Syndrome is a medically recognised ailment that occurs when visitors become overwhelmed by the metaphysical significance of the Holy City and reach the conclusion that they are biblical characters or the Apocalypse is drawing near. Doctors estimate the syndrome affects between 50 and 200 people per year, and although many have a recorded history of mental health issues, about a quarter of recorded cases have no previous psychiatric record.
Source: Lonely Planet

Mini Post – 24 hour Guide to Christmas Past in London

For the Christmas season I have written a short – 24 hour (or possibly 48 hours if you don’t want to overindulge too much in one day) guide to Christmas Past in London for the virtual food journalism magazine ‘Binge’

Photograph by Addie Chinn

It is suited for all ages and one thing it will guarantee is that by the end of the day you will be feeling very festive. All the places I have chosen for the guide can be done on foot as they are in walking distance from one another, albeit over a mile or so. It concentrates on the areas of Clerkenwell, Shoreditch and Spitalfields, with its cobbled streets and ghosts of Christmas past. One of the events I mention is taking place THIS Friday and the good news is that it is totally free to attend. Indeed a couple of the suggestions I have made are free, which is always a bonus. The guide costs £3 and you can sign up here. 

If you do decide to purchase a guide I would love to hear what you end up doing, so either leave a message below or you can leave a comment on my instagram page @chilliandmint

I have a lovely recipe for you which I plan to post in the next few days, so will be back soon.

Merry Christmas


SaveSave

SaveSave

SaveSave


How to Make Sri Lankan/ Southern Indian Sambar

So how have you been getting on with making ‘hoppers/appam’ at home? Has anyone been brave enough to give them a whirl? I would love to hear how you got on. You do need a special pan mind you, but they are easy to source on the web – I think this is the one that I bought. Perfect christmas gift for anyone with a keen interest in cooking? If you do give them a go PLEASE can you post it up on Instagram and tag me @chilliandmint and #chilliandminthoppers. Thank you.

As promised todays post is all about the sambar. Sambar is very similar to a dal, the main difference is that it is more of a lentil based vegetable stew, whereas dals tend to be more of a lentil soup with maybe one of two vegetables incorporated within it. Sambar often has a tamarind broth as its base note, which can also be found in dal – for example toor dal – but not exclusively. It is eaten in both Southern Indian and Sri Lanka and once you have made the spice blend you can keep making it in a relatively short space of time. I hosted a Sri Lankan lunch recently where I basically fed my pals a typical Sri Lankan breakfast…but I gave it to them for lunch (they weren’t to know). Egg hoppers, sambar, pol sambol (similar to a dry coconut chutney) and an onion relish. I think it was a hit.

When you make sambar you can use any vegetable that needs using up. Unless you live near an Asian grocers you are unlikely to come across ‘drumstick’ which is fairly typical to see in a sambar. Don’t worry, just pop in marrow, courgette, pumpkin, squash, green beans – anything that needs using up will work a treat.

Sambar Powder

50g chana dal (split husked Bengal gram)

50g urid dal (split husked black gram)

30g coriander seeds

2 tbsp cumin seeds

1 tsp fenugreek seeds

1 tsp black peppercorns

10 dry red chillies

12 fresh curry leaves

1/2 tsp turmeric powder

1/2 tsp asafoetida/hing powder

1 tbsp desiccated coconut (or fresh of course!)

  1. Heat a dry frying pan over a low heat and dry roast both dals until they turn bronze slightly – a couple of minutes max. Place in a bowl to one side.
  2. Using the same pan add the coriander, cumin, fenugreek, black peppercorns and dried chillies and move them around the pan for 30 seconds. A wonderful aroma will be released.
  3. Add the fresh curry leaves, asafoetida, turmeric and desiccated coconut and mix it all around the pan for another 20 seconds and then place in the bowl with the dals.
  4. Let it all cool and then whizz it up in a spice grinder. I have this one and it works a treat.
  5. Store in an airtight container and use as and when you need it.


Sambar

You can make it with a range of different lentils but I find that red lentils work really well as they take the least amount of time to cook.

200g red split lentils, washed under cold water for a couple of rinses

water to cover the lentils about an inch above (you can always add more if it dries out)

2 green chillies, sliced lengthways and seeds kept in

1/2 tsp turmeric powder

******

250ml tamarind water (use a walnut size piece of tamarind – see notes below)

2 tbsp oil (rapeseed/vegetable)

1 tsp mustard seeds

1 tsp cumin seeds

7 fresh curry leaves

2 dried chillies (split in two)

1 medium onion, finely chopped

4 garlic cloves, finely chopped

80g of pumpkin/squash, cut into 1 cm pieces

80g carrots, cut into 1 cm pieces

80g aubergine/green/runner beans, cut into 1 cm pieces

1 large drum stick, washed and part of the outer green skin removed, chopped into 1 inch pieces, optional

250ml tamarind water (use a walnut size piece of tamarind – see notes below)

1 tbsp sambar powder

salt to taste

  1. In a deep pan add the lentils, chillies and turmeric powder and cover with water. Simmer gently, removing any scum that may form, for 10-15 minutes, by which time the lentils will have completely softened. Do not drain, instead leave to one side whilst you work through the following steps.
  2. Take a generous walnut size piece of tamarind and place in a bowl and add boiling water to cover it. Leave to rest for 20-30 minutes then strain. Using the back of a spoon push through any of the tamarind pulp. Discard the stones. Place the liquid in a measuring jug and leave to one side.
  3. In a large frying pan/skillet heat the oil and then add the mustard seeds and allow them to gently pop before adding the cumin seeds, curry leaves and dried chillies. Move around the pan for 10 seconds and then add the onion and garlic. Leave to soften, stirring occasionally for around 7 minutes.
  4. Add all the vegetable pieces (they should all be around the same size, other than the drumstick) and mix in with the spices and onions.
  5. Add the sambar powder, salt and tamarind water and bring to the boil.
  6. Lower the heat and place a lid on the pan and allow the vegetables to soften completely – this will take  around 12 minutes. Check that they have softened completely before adding the lentils.
  7. Add the lentils and stir in well to the spices and vegetables. Add more salt if necessary and allow to simmer further for another 5 minutes.

It makes a wonderful ‘soup/stew’ as the days get shorter and the weather colder. If you are living in a warmer climate then sambar is equally good for you all year around.

Have a good week folks.


SaveSave

SaveSave

SaveSave

SaveSave


Mexican Slow Cooked Pork Cheeks With Chipotle, Polenta and Fino

IMG_1969-2

With the clocks having gone back last weekend, the nights are drawing in earlier and winter seems almost knocking at our door. With the colder months set out before us, hearty food comes into its own. It’s with this in mind that I came up with this wintery of dishes. The type of meal that you can only really do justice to after a long bracing walk. Pork cheeks, if you have never tried them before, are flakey, succulent and a real treat to have now and again. I cook them at a low temperature (130 degrees) for 3 hours, which gives a similar texture to pulled pork. I have combined them with a Mexican influenced sauce, which envelopes the pork cheeks making them irresistibly tasty.

IMG_1977

I have paired the dish with a glass of Fino, which cuts through the sweet, sticky richness of the pig cheeks sauce. I ordered both the pork cheeks and Fino from Basco Fine Foods, which are Spanish food importers and supplies based in Yorkshire. They have won many gourmet food accolades and have a wide selection of really tasty food and drink, perfect for the Christmas season. They are well priced and even do next day deliver, which is a real bonus.

IMG_2005

I have paired the pork cheeks with creamy polenta, which is the perfect partner to soak up all the tasty sauce. I know polenta divides people but please trust me when I say it really comes into its own in this dish.

IMG_1980

So I hope you get to give this one a go over the winter months. Let me know how you get on and if you are on instagram take a photo of it and use the #chilliandmint and tag me @chilliandmint so I can see. It comfortably feeds 6 people as you’ll find that two pig cheeks are very filling.

IMG_2019

Mexican Slow Cooked Pork Cheeks With Chipotle 

serves 6

4 whole dried chipotle chillies, seeds removed if you prefer it less hot

1.2 kg pork cheeks

flour for dusting

2 tbsp vegetable oil

1 tsp cumin seeds

350g red onion, finely chopped

1 tsp salt

3 carrots, finely chopped

5 garlic cloves, finely chopped

1 cinnamon stick

2 bay leaves

2 tbsp tomato puree

3 tbsp white wine vinegar

2 tbsp balsamic vinegar

1 handful of fresh oregano

2 tbsp demerara sugar

700ml vegetable stock

50ml Fino En Rama

1/2 juice of an orange

  1. Preheat an oven to 130 degrees.
  2. Place the dried chipotle chillies in a pan of boiling water so that they are covered and simmer for 30 mins.
  3. Place some plain flour on a plate and then dust all the pigs cheeks. Heat a large pan and add a little vegetable oil and bronze the pigs cheeks in batches. This will take a couple of minutes on each side. Place to one side to rest.
  4. In the same pan add a little more vegetable oil and add the cumin seeds followed after 20 seconds by the red onions and salt. After 5 minutes add the carrots and garlic and simmer gently for a further 5 minutes.
  5. Meanwhile drain the chipotle and remove any seeds. Using a blender, blend them into a smooth paste.
  6. Add the cinnamon stock, bay leaves, tomato puree, chipotle paste, both vinegars, the Fino En Rama, fresh oregano and demerara sugar.
  7. Return the pig cheeks to the pan and coat them in the sauce.
  8. Add the vegetable stock so that the pig cheeks are submerged and place them in the oven for 3 hours.

**********

Perfect Polenta

200ml milk

600ml water

1/2 tsp salt

150g powdered coarse polenta/cornmeal

1 heaped tbsp butter

  1. Heat the milk and water in a pan and add the salt.
  2. When the milk/water has boiled add the powdered polenta and whisk so that it become smooth and mixes completely with the water/milk.
  3. Whisk every few minutes, on a low heat, for 10-15 minutes so that the polenta remains smooth. Add a little more milk if you feel it is a little too thick. It will begin to come away from the sides. Taste to see if it is done and serve immediately.

Note: This post was kindly sponsored by Basco Fine Foods.

IMG_1975

SaveSave

SaveSave